一行command搭建机器学习环境,包括 Tensorflow家族, PyTorch家族, Keras, Sklearn和 Jupyter, VS Code, Tensorboard等开发工具
这篇博文的终极目标不是单纯教大家一行command搭建机器学习环境,它的终极目标展示docker的威力,让大家早日离开“解放前”的日子,早日投入docker的环抱。
docker是什么?
Docker allows you to package an application with all of its dependencies into a standardised unit for software development.
先演示一行command版
确保docker已经在本地机器安装并处于运行中,然后在控制台执行:
docker run -d -p 8080:8080 --name "ml-workspace" -v "${PWD}:/workspace" --env --shm-size 512m --restart always mltooling/ml-workspace:latest
稍等几分钟(首次运行需要下载2G左右的镜像文件)并在浏览器打开 http://localhost:8080 就能看到一个Jupyter中的welcome页面介绍如何使用这个机器学习研究环境:
以下重点摘要:
This workspace is the ultimate tool for developers preloaded with a variety of popular data science libraries (e.g., Tensorflow, PyTorch, Keras, Sklearn) and dev tools (e.g., Jupyter, VS Code, Tensorboard) perfectly configured, optimized, and integrated
这是一个为开发者准备的,终极的机器学习工具箱,各类工具(e.g., Tensorflow, PyTorch, Keras, Sklearn) 和 (e.g., Jupyter, VS Code, Tensorboard)已经安装好,优化好,完美配置好,集成好,开箱即用。
💫 Jupyter, JupyterLab, and Visual Studio Code web-based IDEs.
🗃 Pre-installed with many popular data science libraries & tools(Tensorflow, Keras, Pytorch, Sklearn, XGBoost, Theano, Fastai, and [many more](https://github.com/ml-tooling/ml-workspace/tree/master/resources/libraries)).
🖥 Full Linux desktop GUI accessible via web browser.
🔀 Seamless Git integration optimized for notebooks.
📈 Integrated hardware & training monitoring via Tensorboard & Netdata.
🚪 Access from anywhere via Web, SSH, or VNC under a single port.
🎛 Usable as remote kernel (Jupyter) or remote machine (VS Code) via SSH.
🐳 Easy to deploy on Mac, Linux, and Windows via Docker.
Within the Tools folder on the desktop, you will find a collection of install scripts that makes it straightforward to install some of the most commonly used development tools, such as Atom, PyCharm, R-Runtime, R-Studio, or Postman (just double-click on the script).
除此之外,桌面的Tools文件夹下有100个常用工具一键安装、配置脚本。
还需要其它工具? Miniconda 3 (Python 3.6), Java 8, NodeJS 11都已经集成了,可以随时使用 pip, apt-get, conda, or npm 安装更多所需工具。
再演示“连command都不需要了”版本
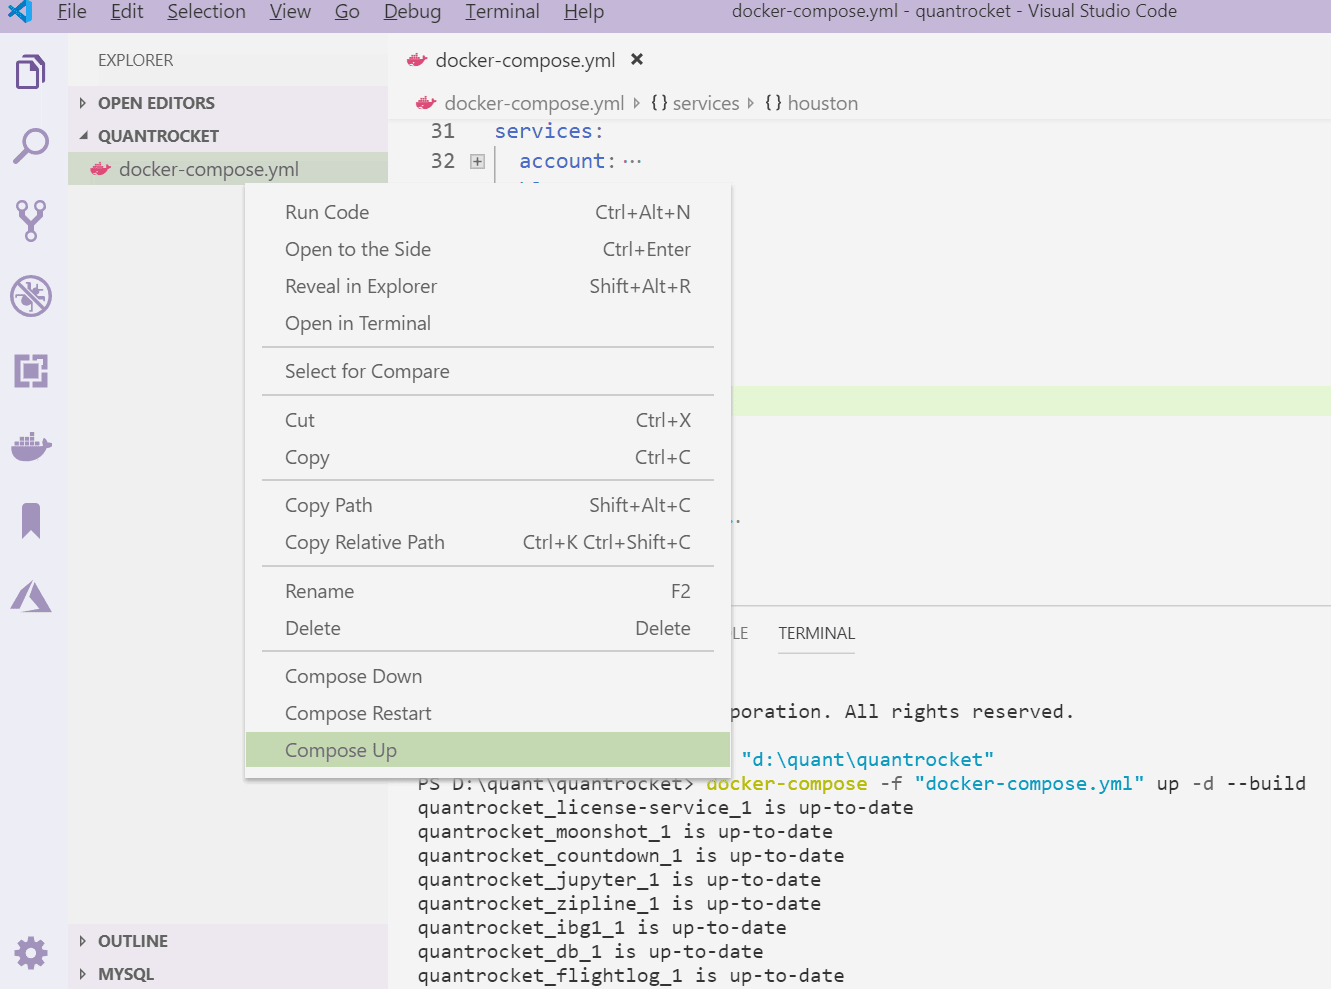
在本地host机的VS Code 中创建一个docker-compose.yml文件
version: '3'
services:
  workspace01:
    image: mltooling/ml-workspace:latest
    volumes:
      - ./workspace01:/workspace
    environment:
      - AUTHENTICATE_VIA_JUPYTER:tokeeeeeeeeen
    ports:
      - "8080:8080"

  # workspace-dev:
  #   image: mltooling/ml-workspace:latest
  #   volumes:
  #     - ./workspace-dev:/workspace
  #   environment:
  #     - AUTHENTICATE_VIA_JUPYTER:tokennnnnnnnnnnnnnnn
  #   ports:
  #     # - "${PORT}:${PORT}"
  #     - "8081:8080"
右单击刚创建的文件 选择 compose up (不懂点击这里看图), 剩下的步骤和刚才上面的例子是一样的了。
回到终极目标:
我不确定大家都是怎么搭环境和处理基础设施的,一般都是 1)本地安装(安装到host机)。 2)虚拟机,包括vagrant。 3)docker容器类。
而使用docker有以下优点:
- 触手可及: 基本上都是1行command就能运行自己想要的工具,这篇博文介绍的工具docker hub上的镜像也一样。
- 知识重用1:这篇博文中提到的mltooling/ml-workspace这个镜像的作者无疑分享自己多年的机器学习环境搭建经验,但却不需要大面积的文档介绍如何配置环境。
- 知识重用2:
- 知识重用2:
- 官方水准:docker hub上的很多镜像都是由软件作者官方提供,借助自己对自家软件的了解,全面考虑到性能、安全、优化等。除此之外docker也提供官方认证的镜像。
- 安全1: docker官方会定时对docker hub上的镜像做安全扫描。
- 安全2: 如果你不放心,可以inspect用于构建镜像的dockerfile,看看一个镜像使用什么创造系统,在上面安装了什么软件/应用。
- 安全3: 如果真有什么不良应用组成的镜像,它的运行也无法伤害host机和host机上的应用,因为它在容器中运行的,被隔离了。
- 利用docker的特征:例如你可以利用docker限制tensorflow最高使用的cpu和内存,以达到让tensorflow在长时间在个人电脑上跑机器学习任务,同时又保证电脑不太卡影响你使用。如果把tensorflow安装在host机,长时间在个人电脑上跑机器学习任务可是会吃掉将近100%cpu/GPU的。
- 不改变已有习惯:有同学说“我习惯了在homestead下开发Laravel”, 或者“在anaconda下开发python应用”, 不想改变习惯。没事,你可以在docker hub找到homestead镜像 和 anaconda ,而且使用docker运行这些工具还有上面的各种优点和以下“节省空间”的优点。
- 节省空间: 在host机的anaconda clone了一个原本2.0G的environment,并且安装了1个100k的工具包,新旧两个environment一共占用4.1G空间,再继续clone几个就会6.xG 、 8.xG猛的增长。在docker中实现类似功能只会占用增量的空间,还是2.xG,因为它使用分层存储技术。
- 非常适合做试验: